Guide to Adding Plugins to Apache Answer
Unleash collective wisdom with Answer, an open-source Q&A platform software tool that every team needs. For free.
As an Apache Incubator Project, we're dedicated to building a better product, a diverse community, and following the Apache Way.
Contributions are always welcome, and you can learn more about us here:
Visit Answer's official website: http://answer.apache.org/ GitHub: https://github.com/apache/incubator-answerhttps://hashnode.com/settings#
Plugins are like a set of building blocks that you can freely combine to create the functionality you want. Adding plugins is an excellent way to extend Apache Answer's features. This article will provide a detailed guide on the installation steps, helping you easily add plugins and master the process of installing and using them.
Download Plugins
Click here to download the desired plugin from the official Apache Answer plugin repository.
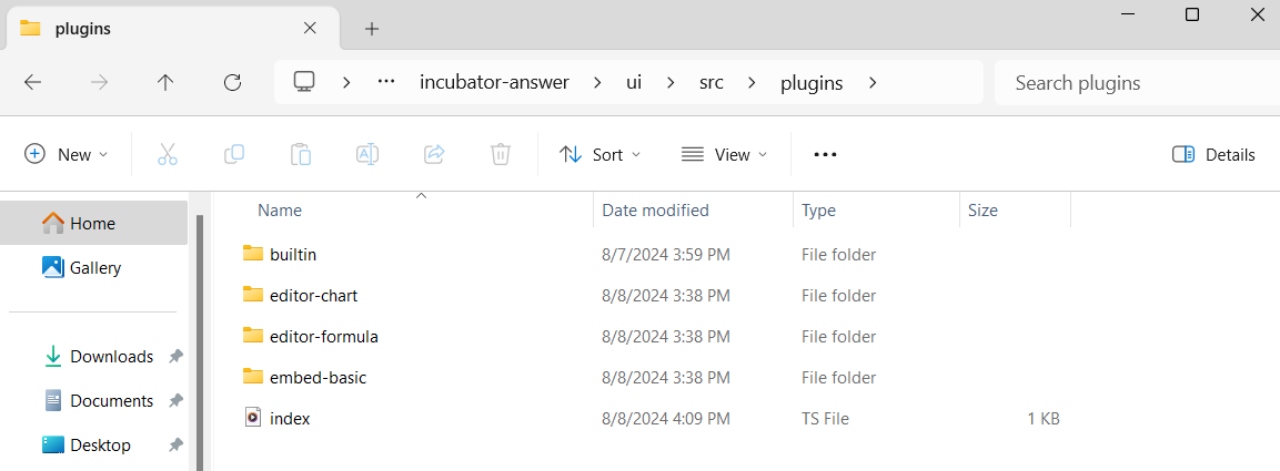
Place the Plugin: Move the downloaded plugin files into the
./ui/src/pluginsdirectory of your project.Plugin Type Reference: https://answer.apache.org/docs/development/plugins
Important: The folder should be named "plugins," not "plugin."
Install Standard UI Plugin
In the terminal, run
cd ./uito navigate to the ui directory.Install dependencies: Run
pnpm pre-install.Start the project: Run
pnpm startto launch the development server.Backend Plugin Setup: In a new terminal window, continue with the backend plugin installation steps.
Install Backend Plugin
- Compile Frontend Code:
Linux/MacOS: Run
make ui.Windows: Run
pnpm installandpnpm build.
- Import Plugin: In the
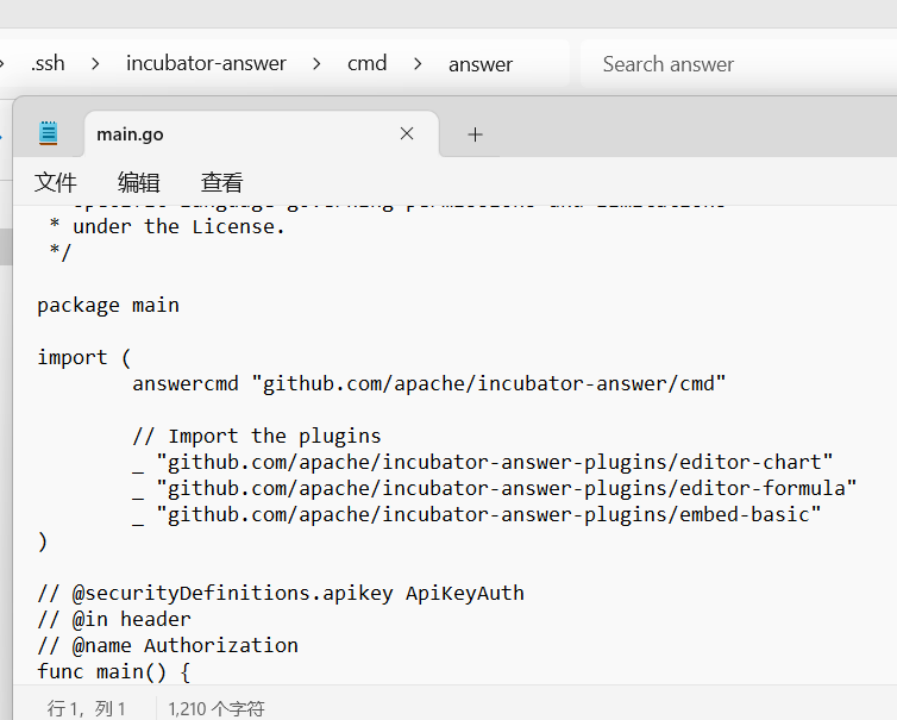
cmd/answer/main.gofile, import the plugin (replace my-plugin with your plugin name):
import (
    answercmd "github.com/apache/incubator-answer/cmd"
    // Import the plugins
    _ "github.com/apache/incubator-answer-plugins/my-plugin"
)
The image below shows examples with the editor-chart, editor-formula, and embed-basic plugins.
- Update go.mod: Navigate back to the project root directory by running
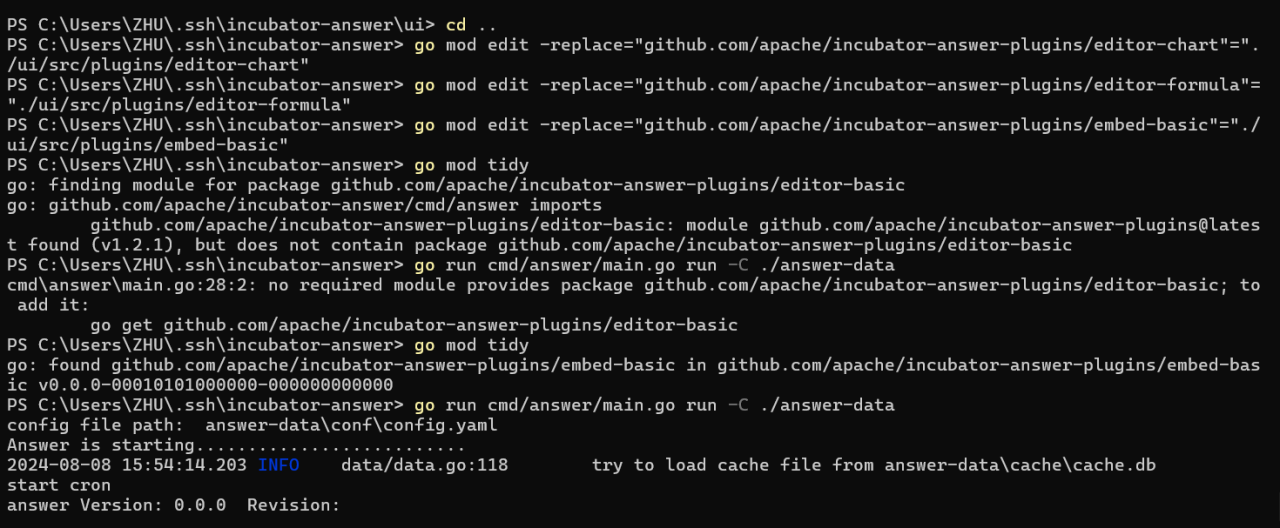
cd ... Usego mod editto add the plugin to the go.mod file:
go mod edit -replace=github.com/apache/incubator-answer-plugins/my-plugin=./ui/src/plugins/my-plugin
Note: Windows users need to use double quotes, as shown below:
go mod edit -replace="github.com/apache/incubator-answer-plugins/my-plugin"="./ui/src/plugins/my-plugin"
Example with the editor-chart, editor-formula, and embed-basic plugins.
Download Dependencies: Run
go mod tidyto download and update dependencies.Start the Project: Run
go run cmd/answer/main.go run -C ./answer-data.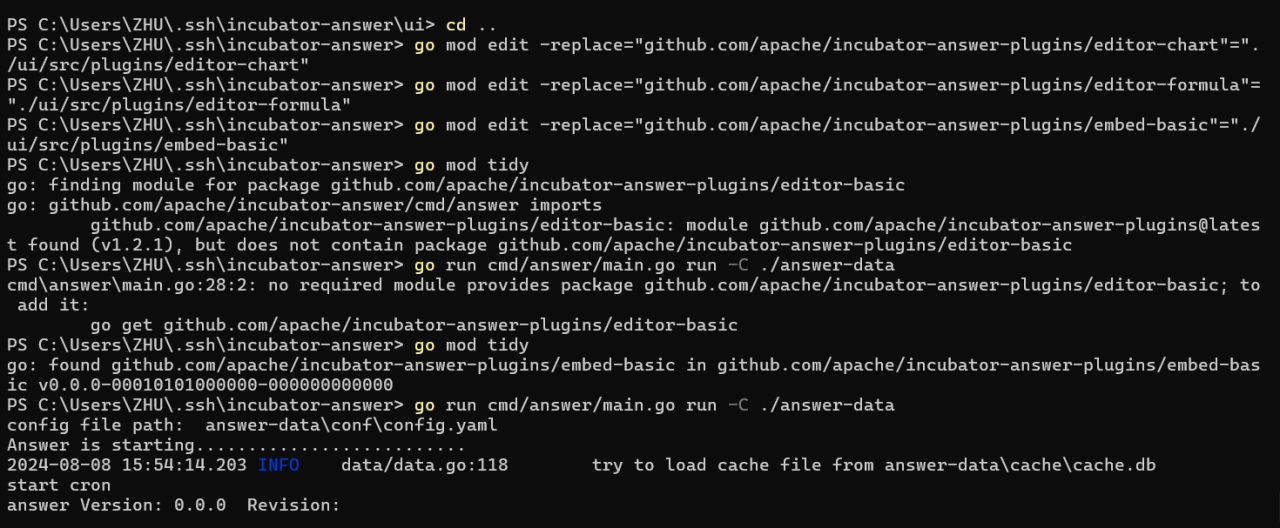
Open the backend interface URL in your browser. Under the Admin - Installed Plugins section, you'll see the added plugins. Click the ⋮ in the Action column to activate or remove the plugin.
Congratulations, you've successfully added a plugin! Click here to explore more community-built plugins. Additionally, we offer a detailed tutorial on How to Package and Deploy Answer Plugins and a Plugin Development Guide to make your Apache Answer even more powerful.